This is where you register, review, and manage your working hours. It gives you an overview of entered hours, expected hours, flex/banked hours, and time registered on projects, helping you keep track of your time and ensure hours are recorded correctly.
The timesheet is an important part of Moment, as it forms the basis for reports, resource planning, and invoices. Ideally, all co-workers should register their hours daily to ensure the most accurate and up-to-date foundation for planning, reporting, and billing.
The Timesheet is displayed in a calendar format, where each day appears as a column.
You can choose between Week view and Month view.
To change the view, click the Settings icon (gear wheel) above the timesheet on the right side and select your preferred calendar view.
- Register hours directly per day
- View hours entered across weeks and months
- Navigate between periods using the arrows at the top
- See totals per day and per week
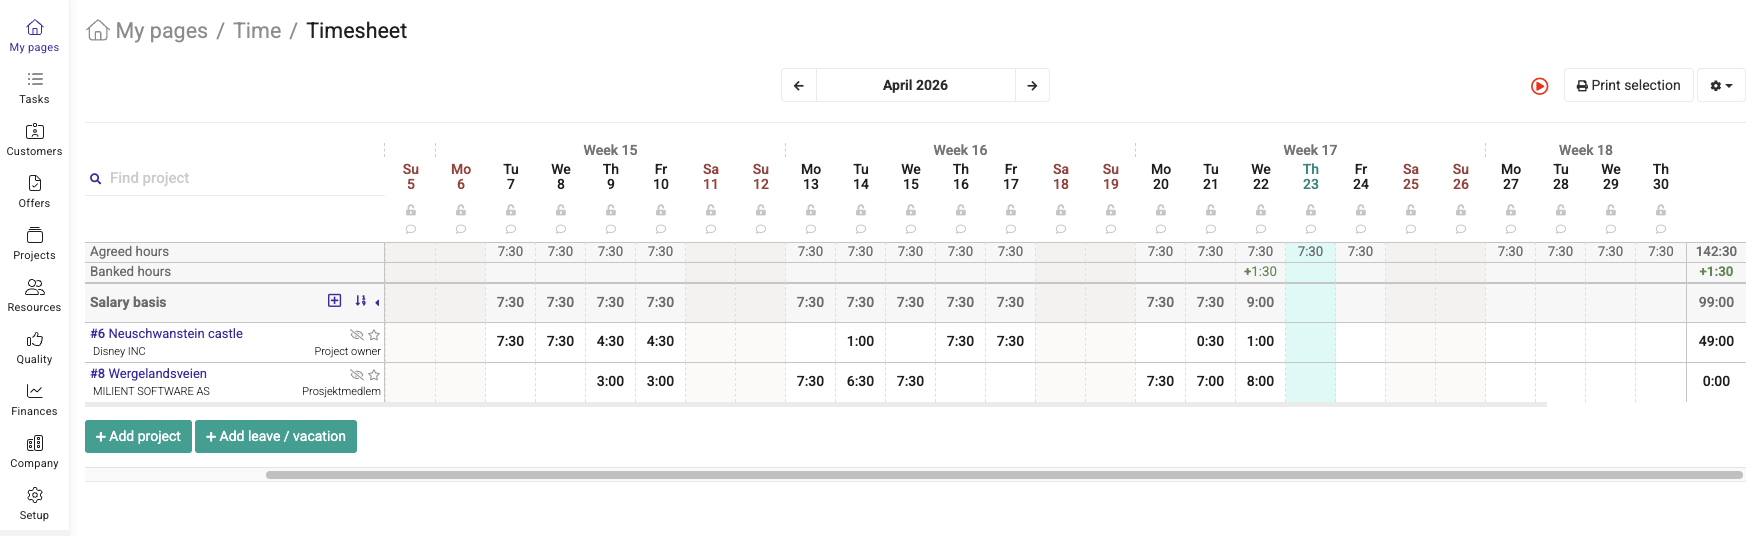
Agreed hours
Shows your expected working hours according to your schedule.
- Daily expected hours
- Weekly or period totals
- Basis for comparing worked time
Banked hours
Shows your flex balance or banked hours.
- Positive or negative hour balance
- Difference between expected and registered time
- Updated based on hours entered
Salary basis
Shows the hours that form the basis for salary calculations.
- Registered salary-related hours
- Total hours included in payroll basis
Project time registration
Below the summary rows, you see projects where time can be registered.
- Register hours on each project
- See hours already entered
- View totals per project
- Add projects if needed using “Add project”
Leave / vacation registration
You can also register absence.
- Vacation
- Leave
- Other absence types
- Add using “Add leave / vacation”
If you register an absence type, such as Vacation, it will appear directly in your calendar view.
To register the same absence for multiple days, move your mouse pointer over the absence type in the timesheet.
A small + (plus) icon will appear next to the absence type.
Click on the + icon and a new window will open. From here, you can select a date range and register the absence for multiple days at once. The absence will automatically be added to all selected days in your timesheet.
Was this article helpful?
That’s Great!
Thank you for your feedback
Sorry! We couldn't be helpful
Thank you for your feedback
Feedback sent
We appreciate your effort and will try to fix the article